

Implementing CI/CD for Flutter apps Using GitHub Actions
Automating Flutter app build, test & release with GitHub Actions


Continuous Integration and Continuous Deployment (CI/CD) is a crucial part of the software development process. It helps automate the build, testing, and deployment of your application, ensuring that code changes are integrated and deployed smoothly. In this blog post, I'll walk you through setting up CI/CD for a Flutter application using GitHub Actions.
Prerequisites
Before you start, ensure that you have the following prerequisites in place:
A Flutter project hosted on GitHub.
Flutter installed on your development machine.
A basic understanding of GitHub Actions.
GitHub Actions Workflow
GitHub Actions uses YAML files to define workflows. In this example, we've defined a workflow named "Build & Release" that runs when pull requests are created or pushed to the main, master, or develop branches.
on:
  pull_request:
    branches:
      - main
      - master
  push:
    branches:
      - main
      - master
      - develop
name: "Build & Release"
This workflow is triggered both on pull requests and direct pushes to specific branches.
Workflow Steps
A sample of the workflow is shown below which basically performs all the continuous integration(CI) part.
on:
  pull_request:
    branches:
      - main
      - master
  push:
    branches:
      - main
      - master
      - develop
name: "Build & Release"
jobs:
  build:
    name: Build & Release
    runs-on: macos-latest
    steps:
      - uses: actions/checkout@v1
      - uses: actions/setup-java@v1
        with:
          java-version: '12.x'
      - uses: subosito/flutter-action@v1
        with:
          flutter-version: '3.13.9'
      - run: flutter pub get
      - run: flutter test
      - run: flutter build apk --debug --split-per-abi
      - run: |
          flutter build ios --no-codesign
          cd build/ios/iphoneos
          mkdir Payload
          cd Payload
          ln -s ../Runner.app
          cd ..
          zip -r app.ipa Payload
      - name: Push to Releases
        uses: ncipollo/release-action@v1
        with:
          artifacts: "build/app/outputs/apk/debug/*,build/ios/iphoneos/app.ipa"
          tag: v1.0.${{ github.run_number }}
          token: ${{ secrets.TOKEN }}
Let's break down the individual steps in our CI/CD workflow:
Check Out the Code
The
actions/checkoutaction is used to clone your repository into the runner's workspace.jobs: build: steps: - uses: actions/checkout@v1Set up Java
       - uses: actions/setup-java@v1
         with:
           java-version: '12.x'
Set up Flutter
Next, we use the
subosito/flutter-actionaction to install the specified Flutter version.- uses: subosito/flutter-action@v1 with: flutter-version: '3.13.9'Get Dependencies & Run Tests
Use the following steps to fetch dependencies and run tests:
       - run: flutter pub get
       - run: flutter test
Build the Android APK
Build the Android APK for your Flutter application in debug mode:
- run: flutter build apk --debug --split-per-abiBuild the iOS IPA
For iOS, we generate IPA as following:
       - run: |
           flutter build ios --no-codesign
           cd build/ios/iphoneos
           mkdir Payload
           cd Payload
           ln -s ../Runner.app
           cd ..
           zip -r app.ipa Payload
Push the artifacts to GitHub releases
Finally, we use the ncipollo/release-action action to package the built artifacts (APK and IPA) and create a GitHub release. It will also tag the release with a version number.
      - name: Push to Releases
        uses: ncipollo/release-action@v1
        with:
          artifacts: "build/app/outputs/apk/debug/*,build/ios/iphoneos/app.ipa"
          tag: v1.0.${{ github.run_number }}
          token: ${{ secrets.TOKEN }}
The TOKEN secret should be set up in your repository's settings with appropriate permissions to create releases.
Pipeline overview
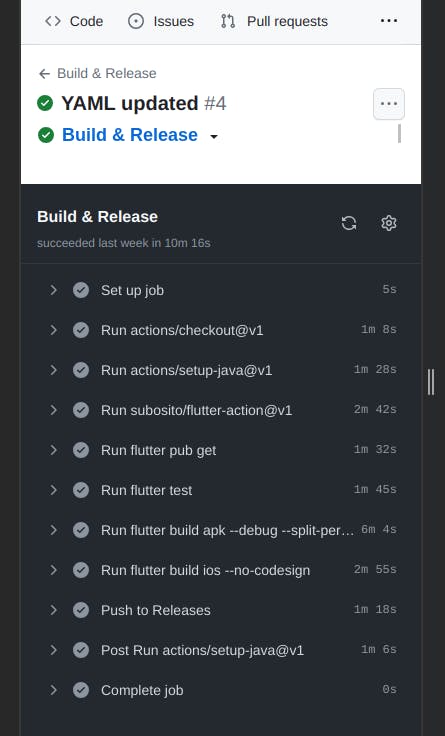
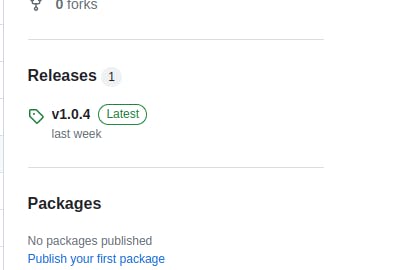
We can view the pipeline in the actions tab of the GitHub repo. After successful completion, it should look something as shown above. And, the release section becomes:
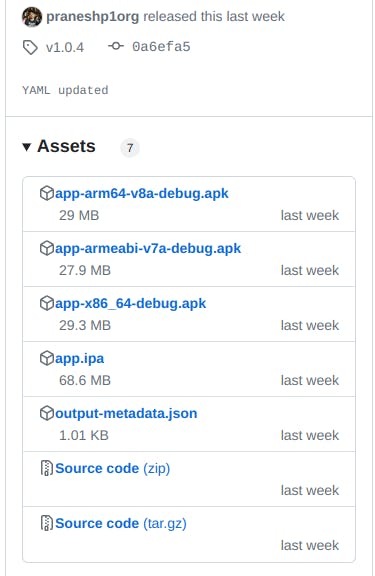
And when you click on the particular release, you get to the artifacts.
This is how the CI/CD pipeline is implemented for Flutter app using GitHub actions.
This article mainly focused on the Continuous Integration(CI) part, the Continuous Delivery(CD) part can be implemented using Fastlane for Appstore and Playstore, which will be discussed in future articles.